

Welcome to our HubSpot FAQs blog, where we address clients most common questions about this CRM platform. Whether you're a new user or have used HubSpot for years, we've got you covered. This blog provides clear and concise answers to frequently asked questions about duplicate contacts, setting up sequences, importing data, setting up meetings, tracking campaigns, and much more!
.png)
With HubSpot, there are a ton of features that may get confusing, so let's get back to a few of the basics!
How do I create a new contact?
In order to create a contact:
Go to the contact drop-down on the left side of the navigation bar, click "contacts", then click the orange "create contact" button on the upper right-hand side of the screen.
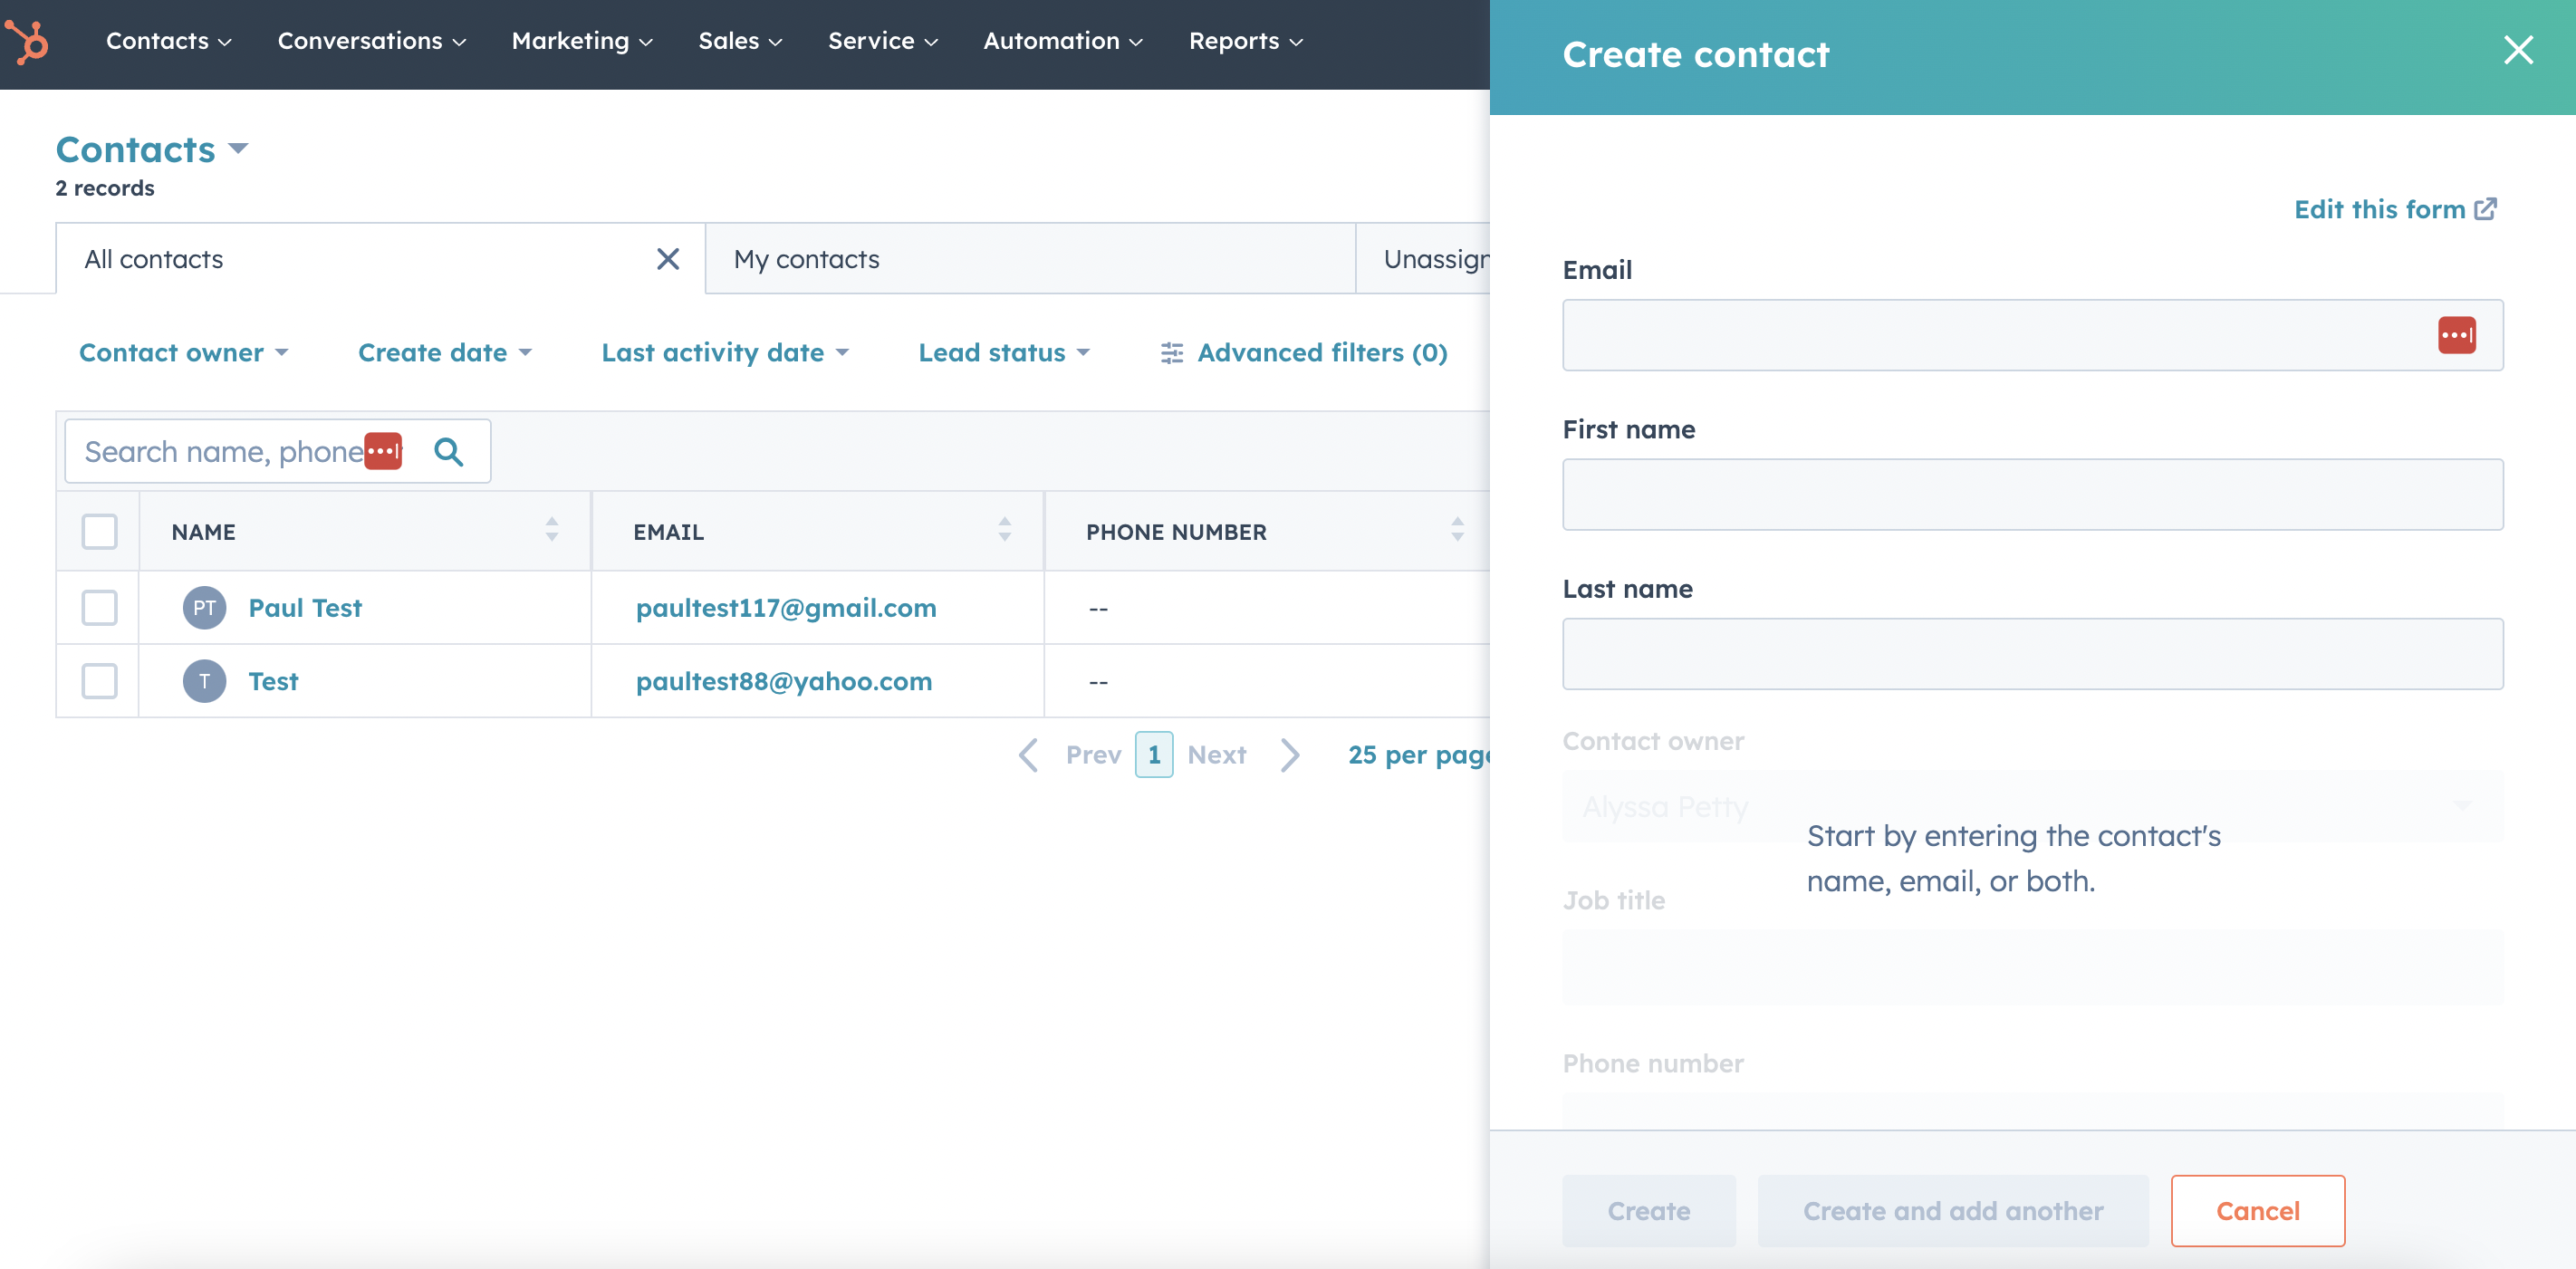
Fill out their name, email, or both.
Then you should be brought to a drop-down like this...
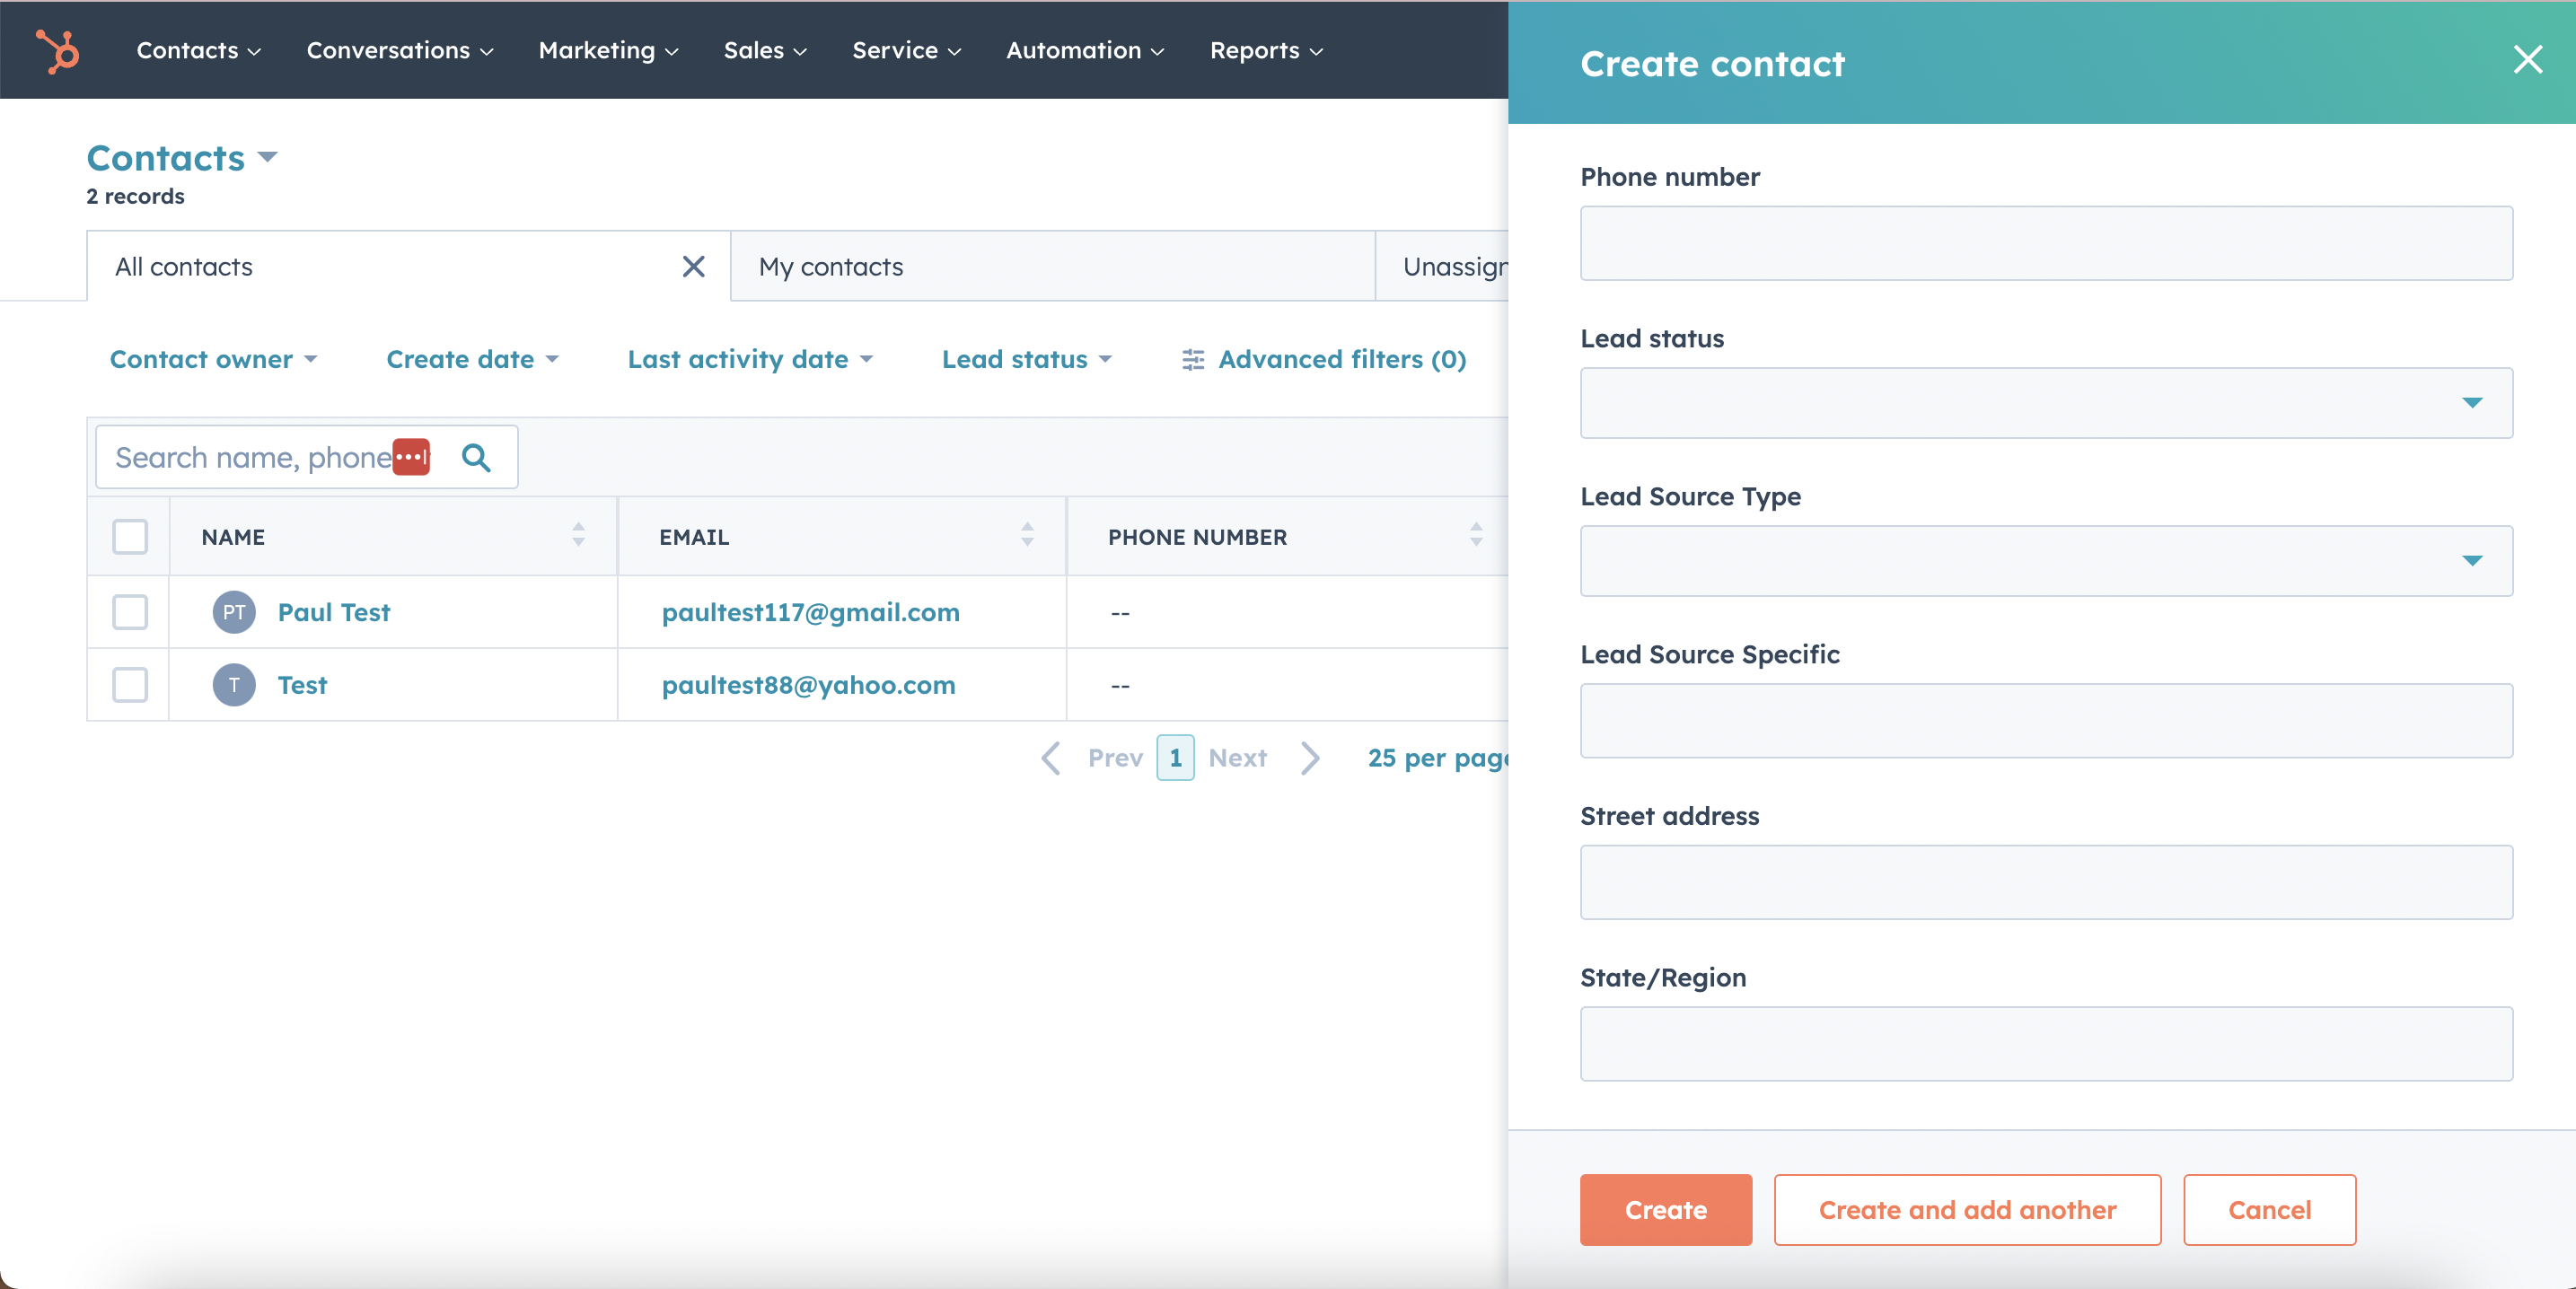
Fill out as much information as you can about the client, then click Create!
How can I create a new deal?
To create a new deal:
Go to "Sales" on the navigation bar and click "Deals".
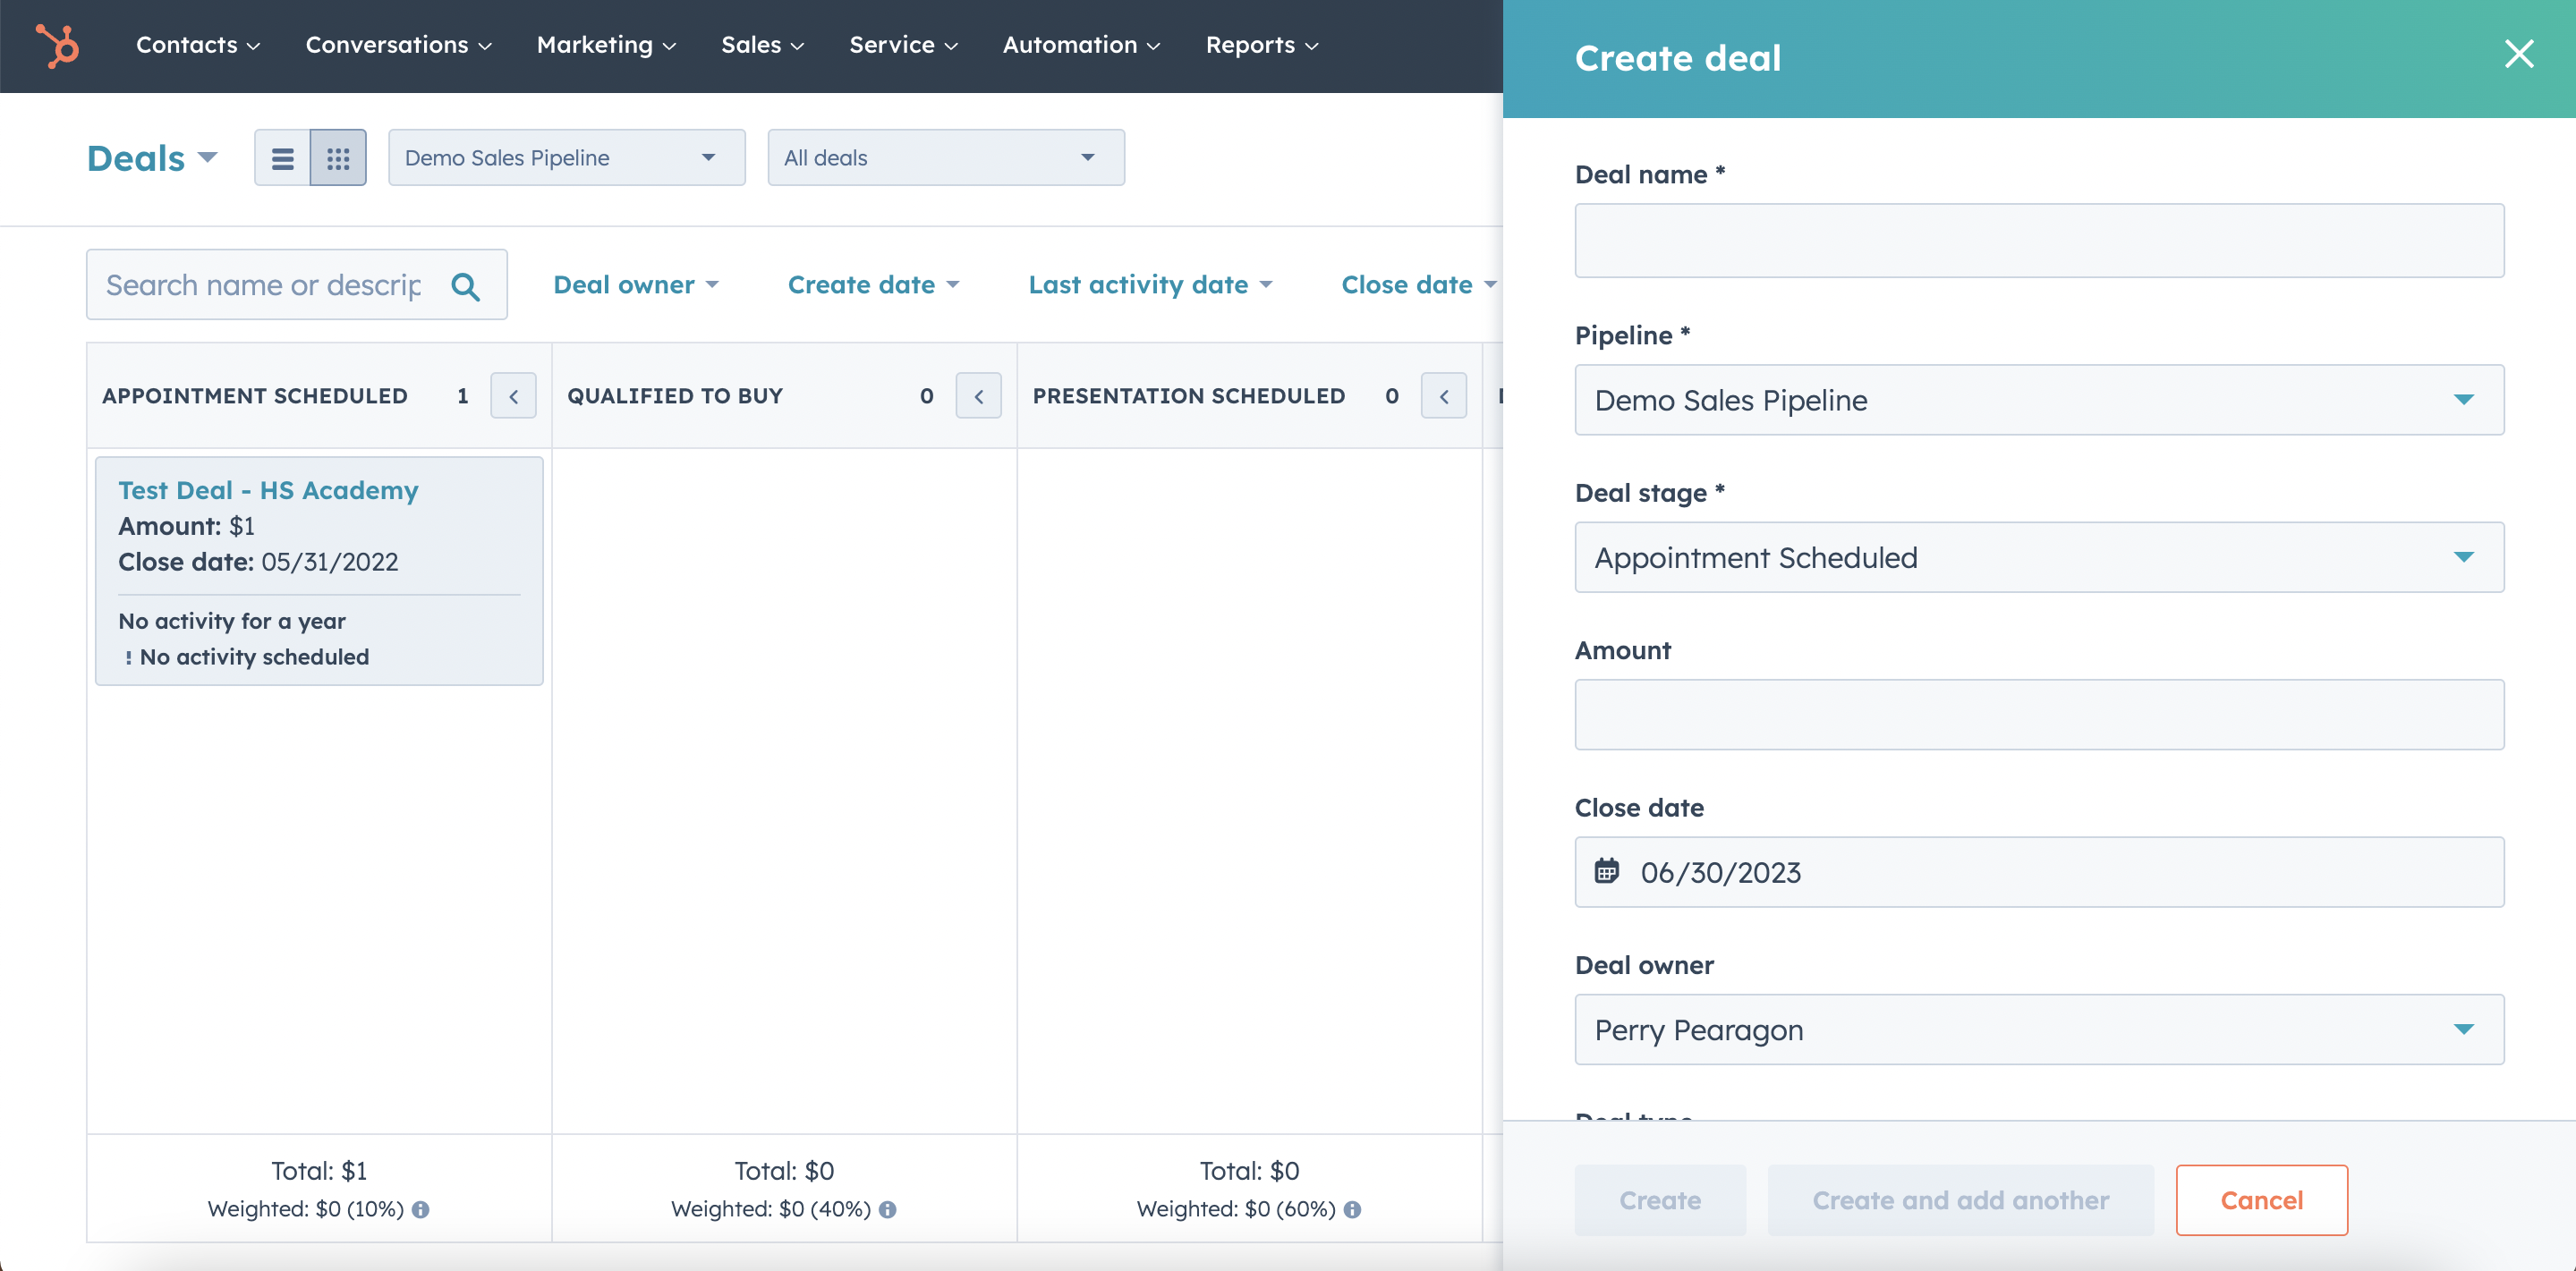
Name your deal, choose which pipeline you want it to be a part of, and choose what stage of the deal it is in.
The different stages include: Appointment Scheduled, Qualified to Buy, Presentation Scheduled, Decision Maker Bought-In, Contract Sent, and Closed Won/Closed Lost.
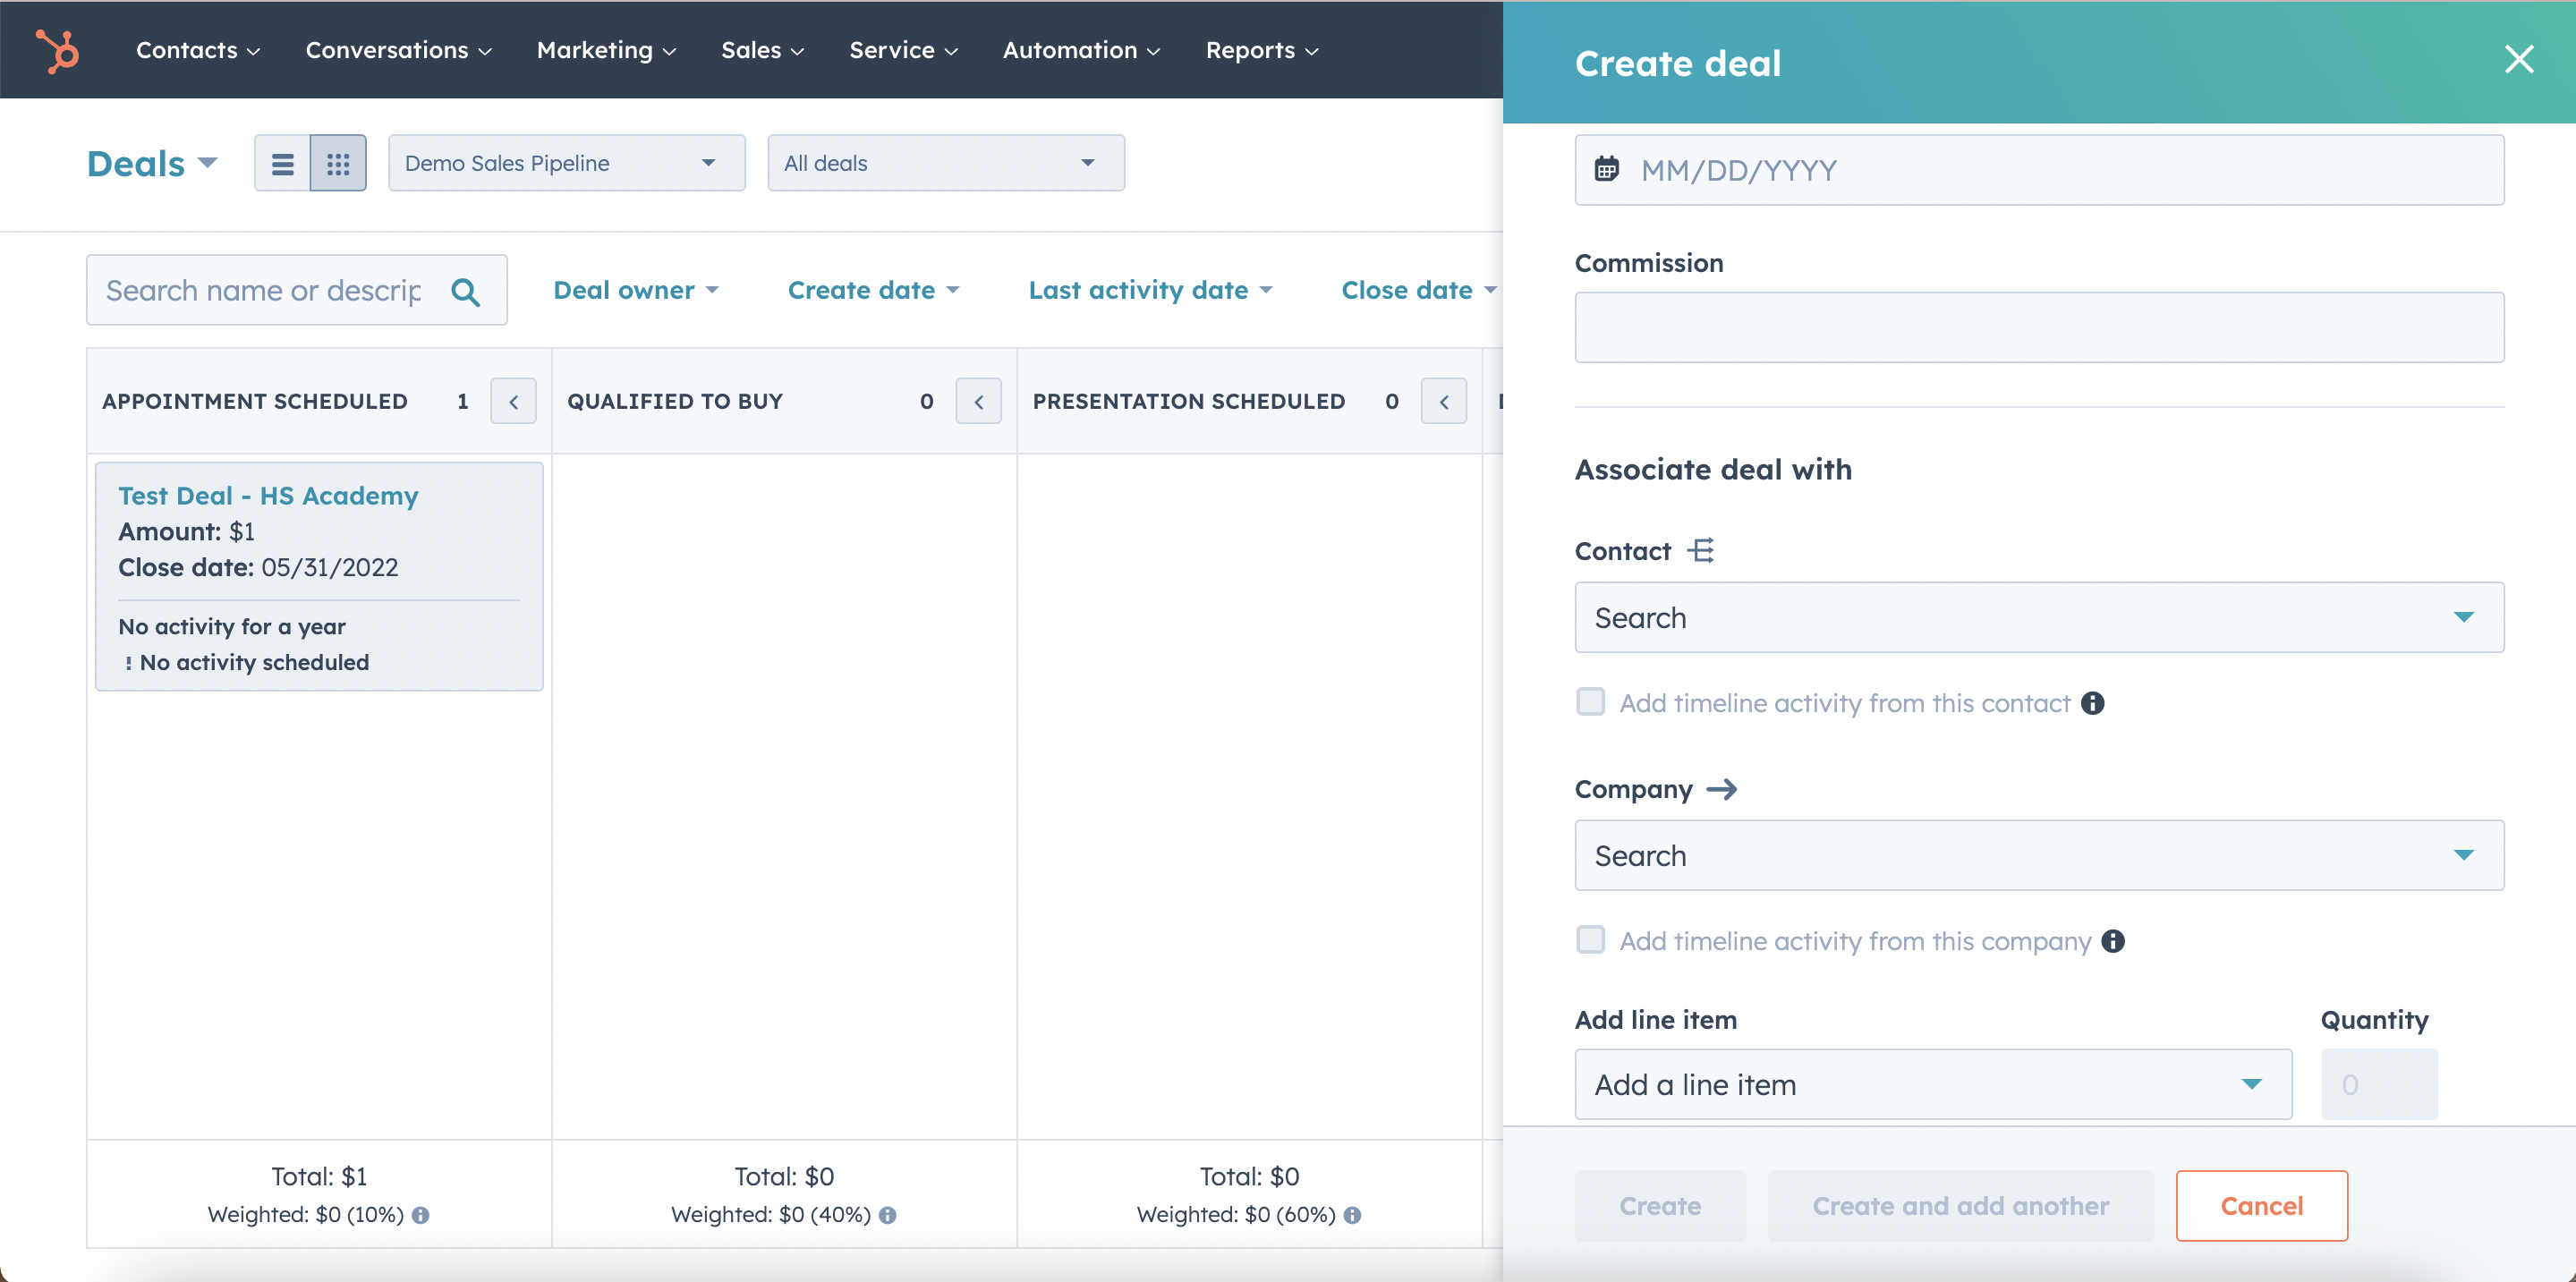
You have the option to put the amount, deal type, commission, and who the deal is associated with.
On the bottom left of the form, it will have an orange "Create" button.
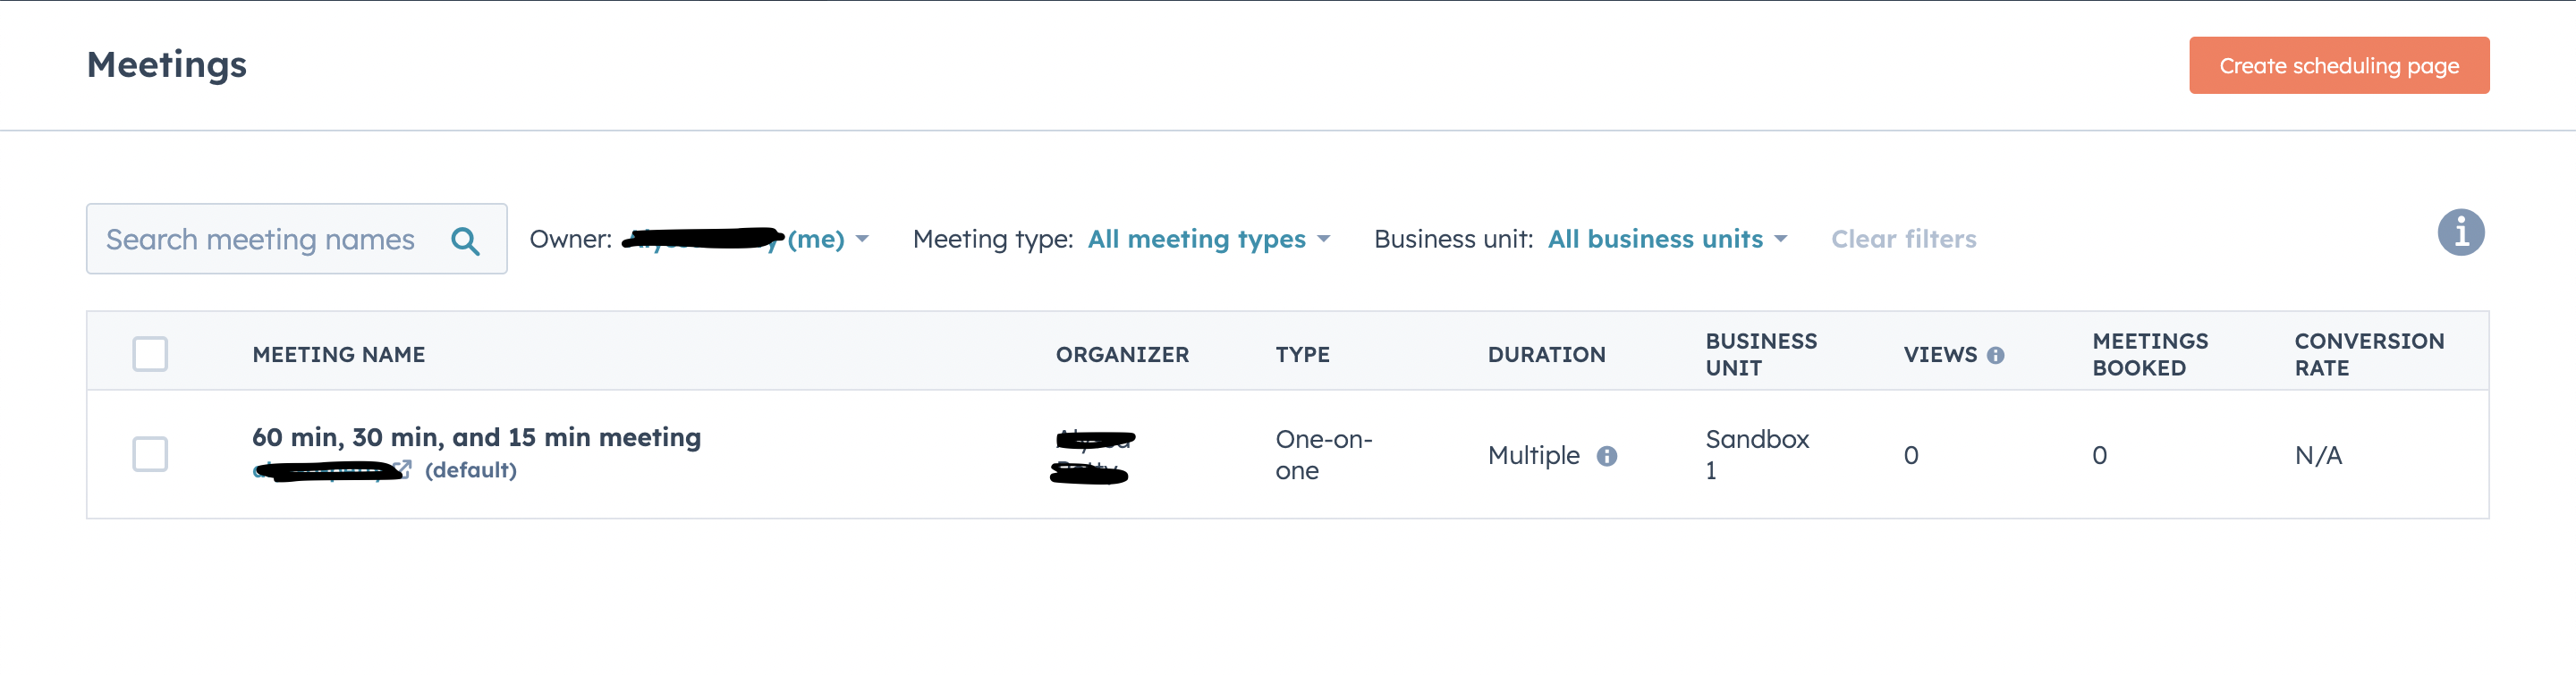
How do I set up a meeting?
Underneath the "Sales" tab on the nav. bar, click "Meetings".
You have the option to sync your calendar with HubSpot so you don't have to worry about manually putting in your availability.
You also have the option to create a one-on-one, group, or round-robin scheduling page. For this example, we will stick with a one-on-one.
Click "Create Scheduling Page" in the upper right corner and select "One-On-One".
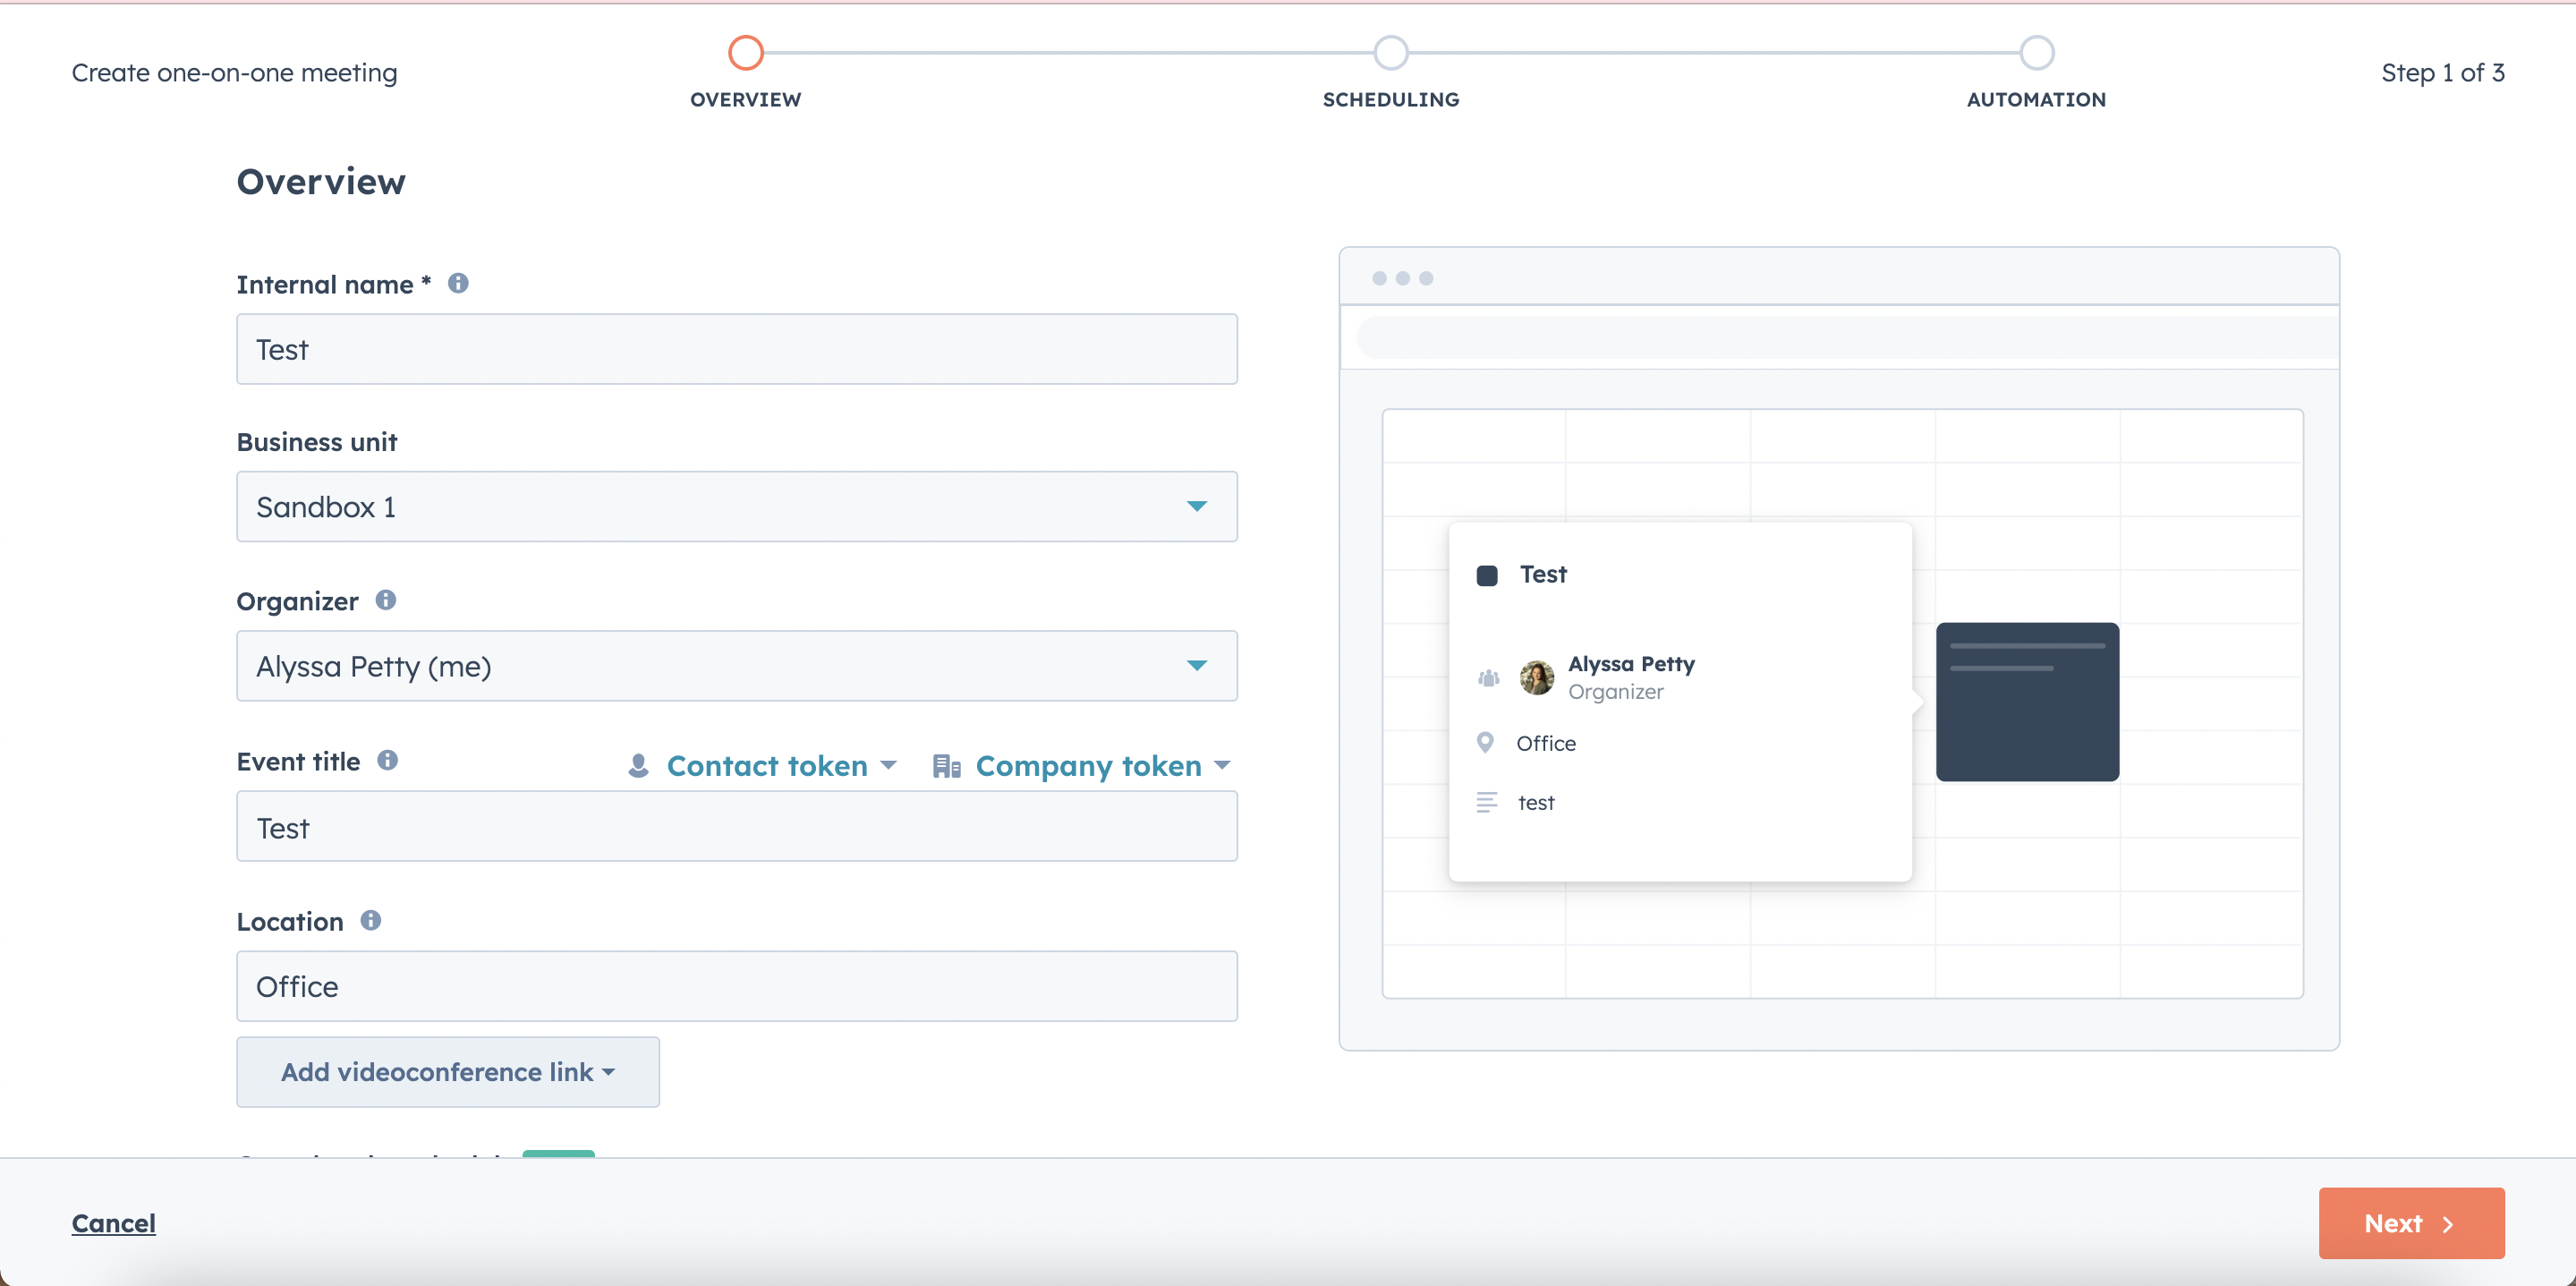
Fill out the name, title, location, and description (if wanted), then click next.
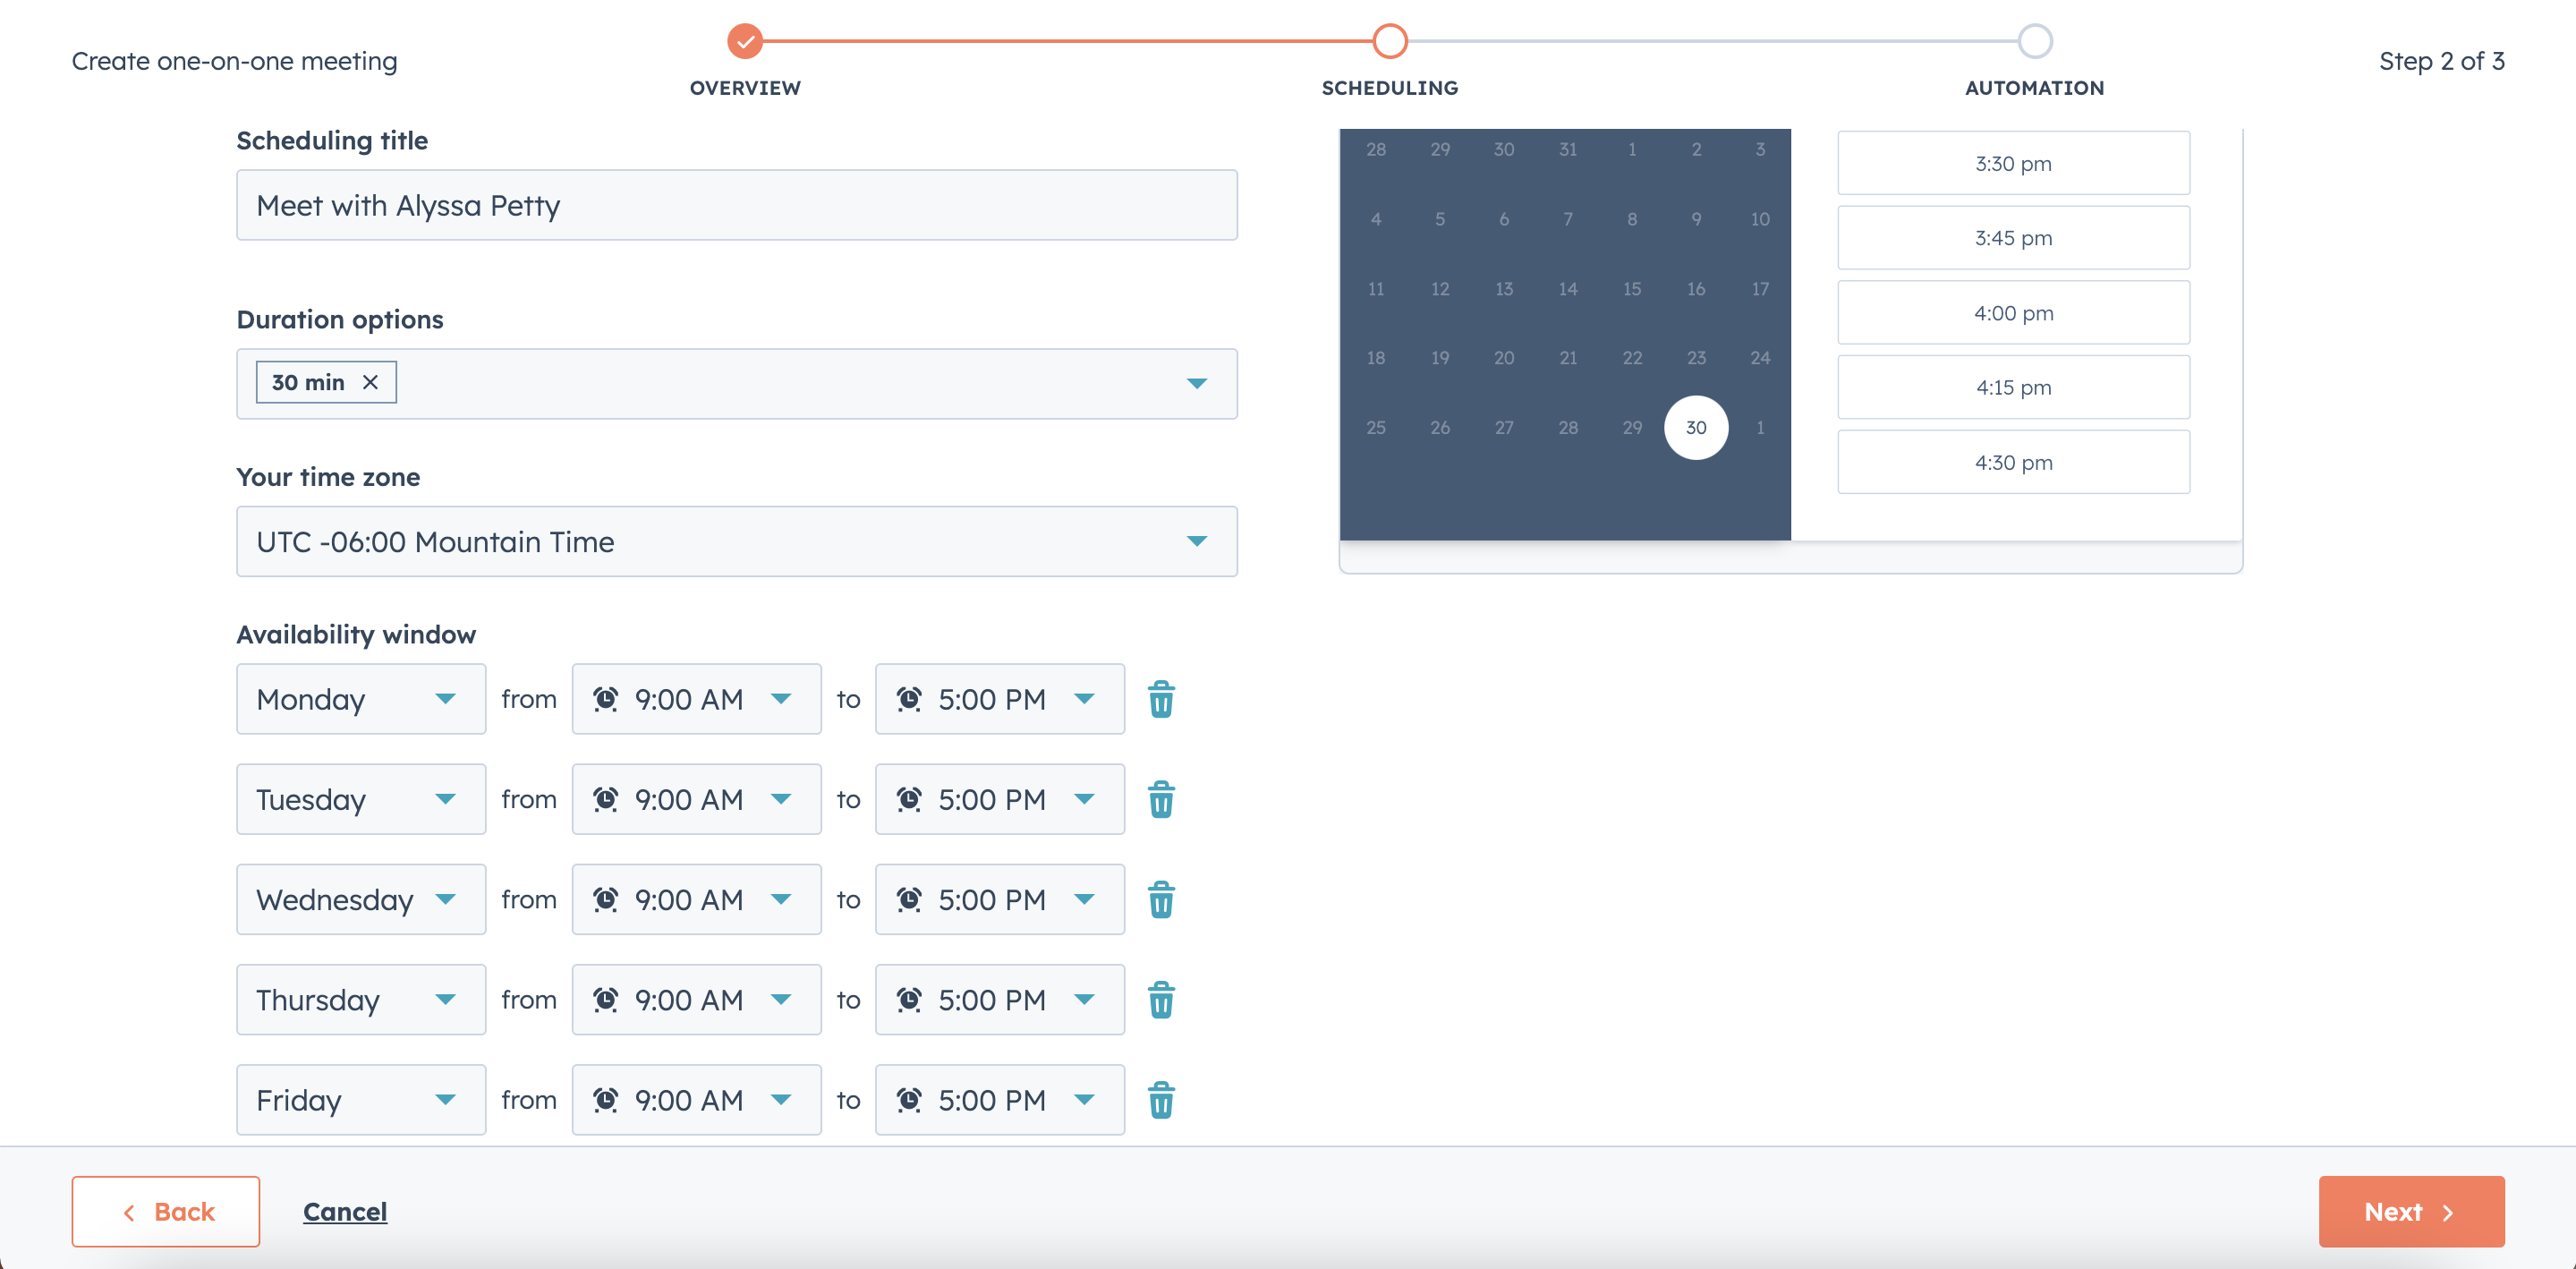
Choose the duration and adjust the availability window if needed. On this same page, you can choose to have the prospects and customers fill out their name and email, as well as choose to display a default confirmation of the meeting,
It will then bring you to the Automation page, where you can choose to send a meeting confirmation email and a pre-meeting reminder. When you are satisfied, click the "Create Scheduling Page" button on the bottom right of the screen.
How do I track the performance of a marketing campaign?
If there is a specific marketing campaign that you want to keep track of, you have to go to the "Marketing" tab on the navigation bar and select "Campaigns".
If you already have some created, you will be shown a list of all the existing campaigns. Click on the the campaign you want to see the analytics of and it should bring you to a page with a graph.
On the table above the graph, you are able to see how many contacts the campaign brought in, sessions, influence contacts, closed deals and influenced revenue.
Below the graph, you can see detailed analytics of CTAs, emails, forms, landing pages, social posts, website pages, workflows, and traffic by way of that specific campaign.
How do I create workflows?
Below is a step-by-step tutorial for a basic workflow, although the possibilities are endless!
How do I import data into HubSpot?
When Importing outside data into HubSpot it is important to keep a few things in mind.
- Organize your data so that you are able to avoid as many inconsistencies as possible.
- There are several different import types, including companies, contacts, deals, tickets, or products.
- When the data is imported you can choose from the following options: update existing records, create records, or update specific properties.
For more detailed instructions about importing data, click the link below for a lesson from HubSpot Academy.
Importing Your Data into the HubSpot CRM
How do I build a sequence?
Below is a step-by-step tutorial for creating a sequence with contact and list enrollment specifically.
Although that may not be what you need specifically, there are other possible sequences shown in the video.
Sequence Walkthrough with Contact and List Enrollment
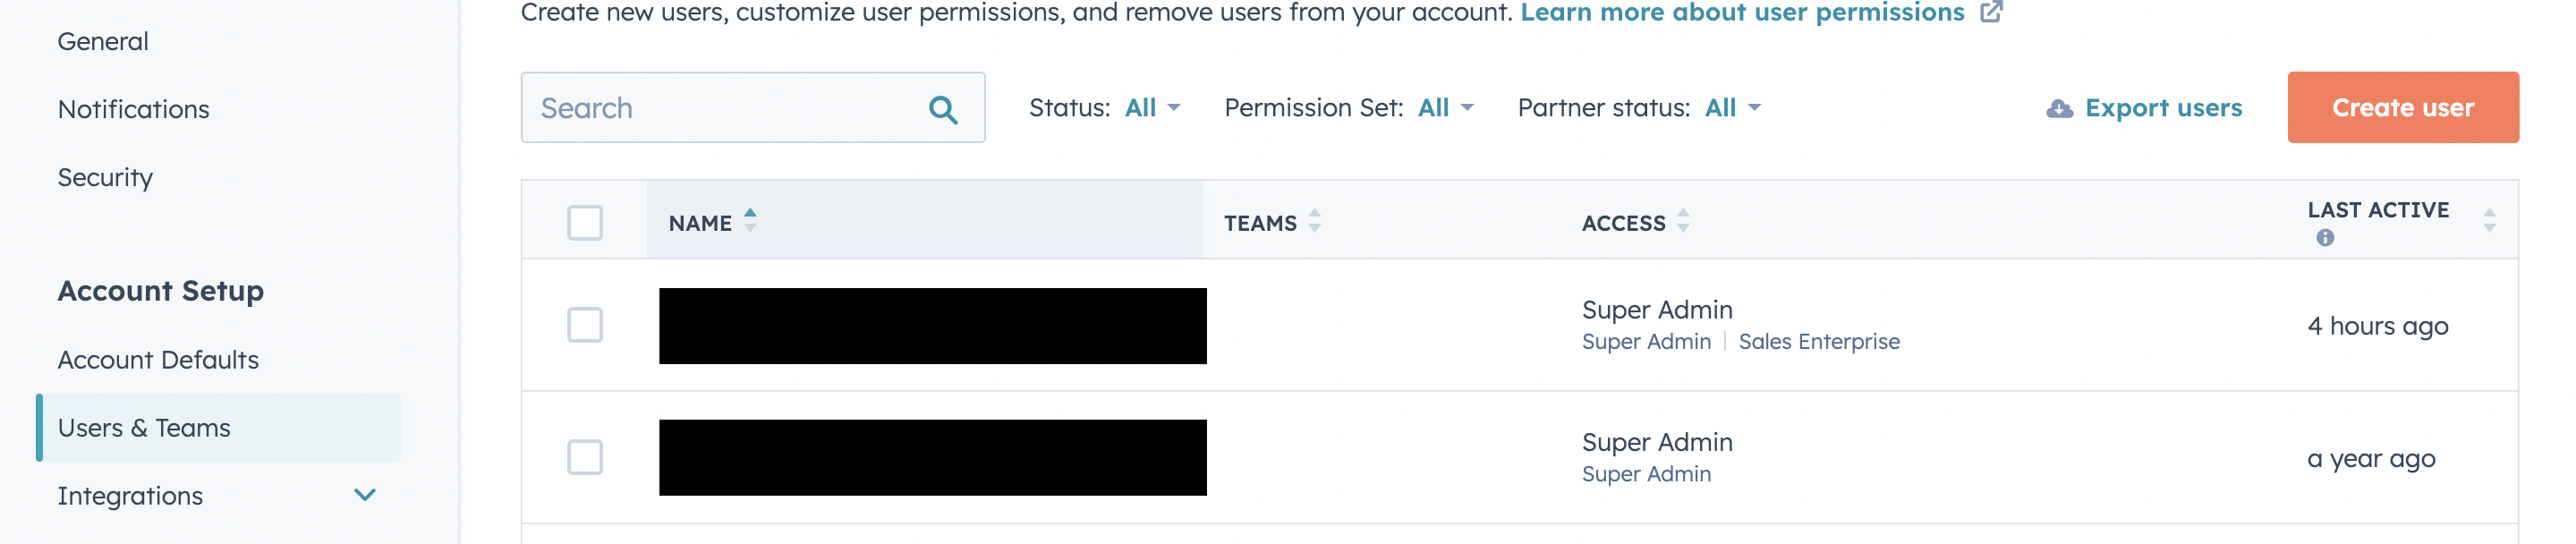
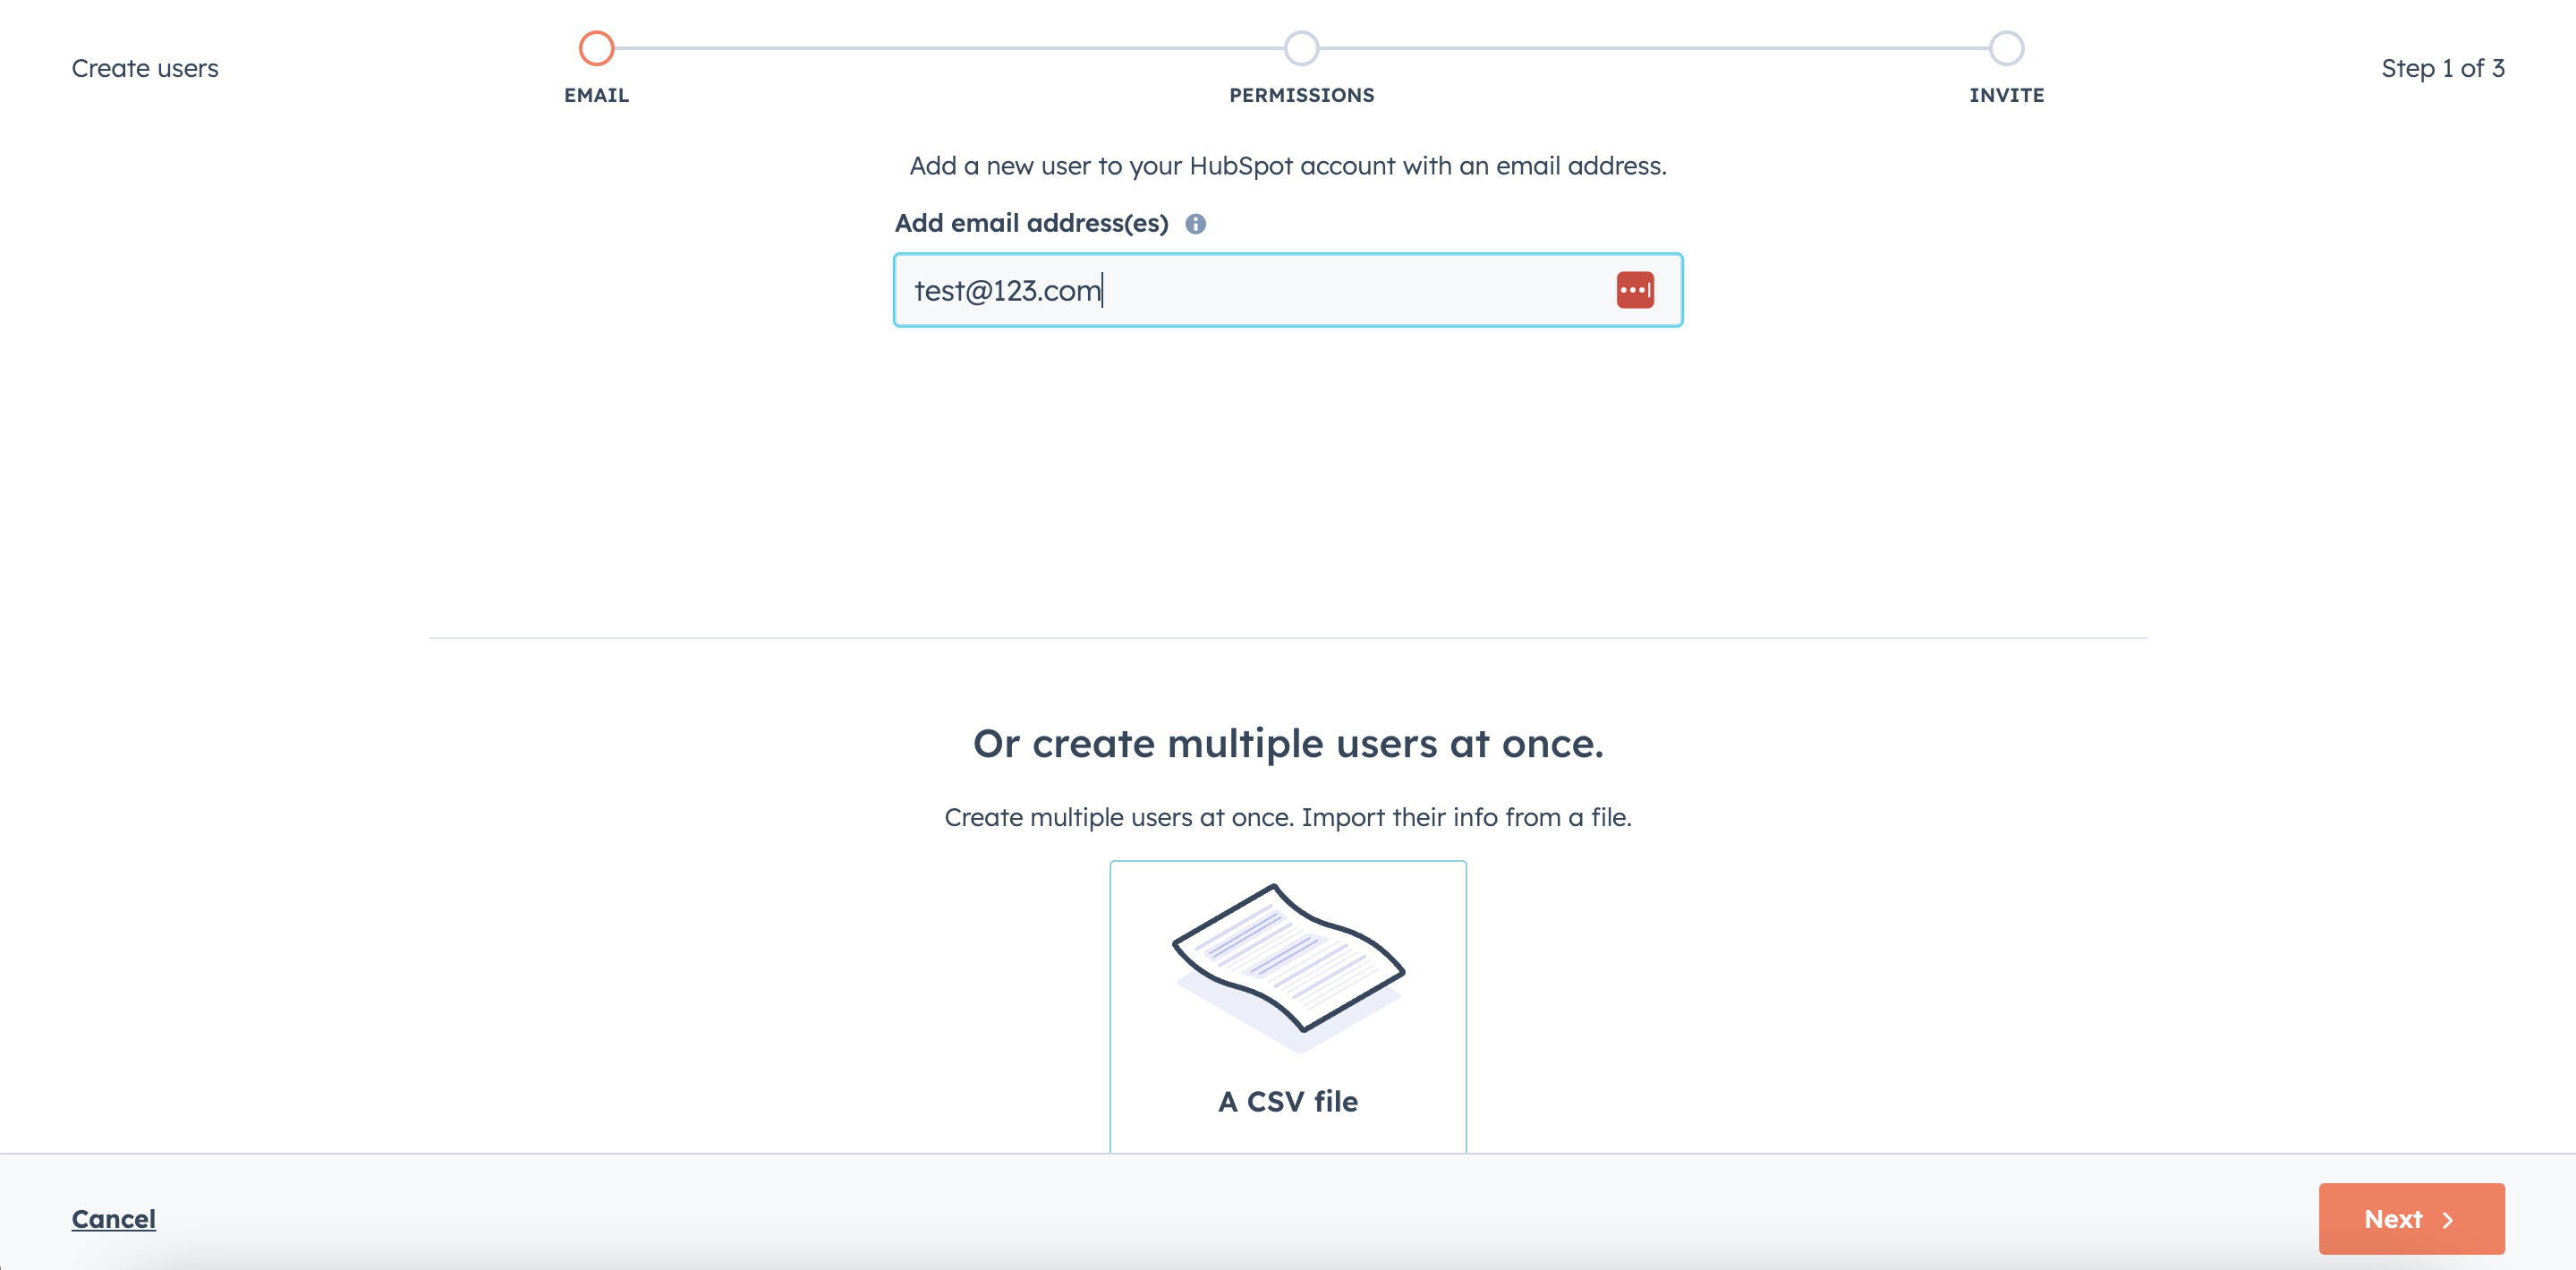
How do I add a user to HubSpot?
In order to add a new user to HubSpot:
Go to Settings in your navigation bar (The gear on the right-hand side), click "Users and Teams" and click the orange "Create User" button on the right.
You will see a page where you can choose to add one or multiple users by either filling in their email addresses or attaching a CSV file.
After clicking the orange "Next" button, you can then set up the user's access levels.
You can choose how to narrow access by using either a custom permission set or template or starting from scratch.
There is an option to base it off of their specific role within the company or you can narrow down access with specific permissions for certain tools. Make sure to review!
Once you've reviewed the user's access levels you can choose to send them an invitation to set up their HubSpot account via email.
How do I connect my personal email correctly (not through conversation inboxes)?
In order to correctly connect your personal email without going through conversation inboxes, click on the settings gear on the navigation bar and find "Integrations" on the left sidebar. You will then choose "Email Service Provider" and click on "Connect Email Provider" in the center of the page.
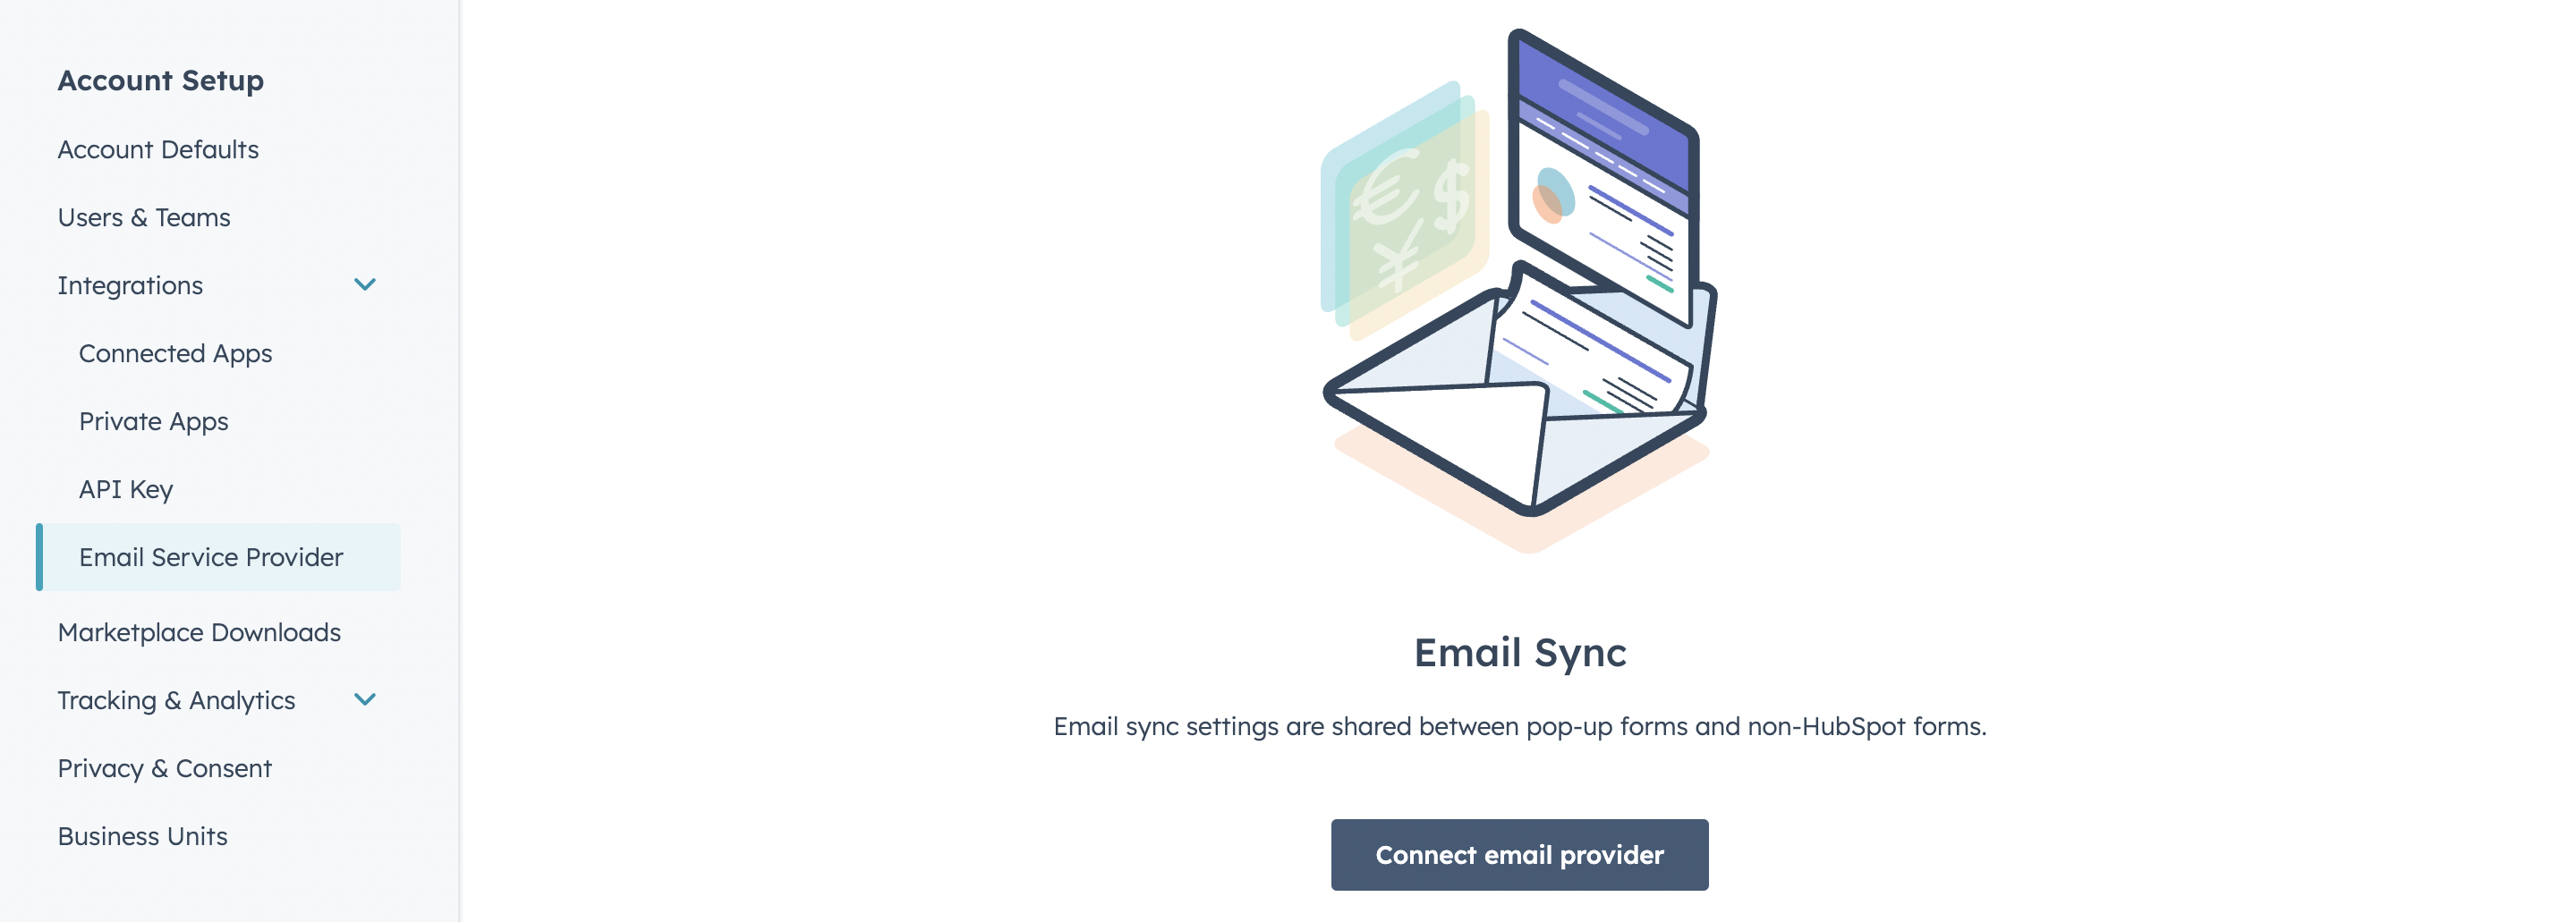
There will be a pop-up with a list of different email providers connected to HubSpot, choose the one that you use and follow the on-screen instructions to connect your account.
Once you have successfully connected, HubSpot is going to start syncing all of your data. You can now send and receive emails, track email opens and clicks, and sync contacts and email interactions.
How do I change an activity to be associated with another record?
In the top navigation menu, click on "Contacts" to access the Contacts module. Search for and locate the contact or record associated with the activity you want to modify. Click on the contact or record to open their details. In the record's details, navigate to the "Activity" tab. This tab will display a timeline of activities associated with the record. Find the activity you want to change the association for and click on it to open the activity details.
In the activity details, locate the section that displays the current association (e.g., associated contact, company, or deal). Click on the "Edit" or "Change" button (the specific wording may vary based on your HubSpot setup) in the association section.
In the association settings, you will have the option to select a different contact, company, deal, or other relevant record to associate with the activity. Search for and select the desired record to associate with the activity. Once you've made the association change, click on the "Save" or "Update" button to apply the changes.
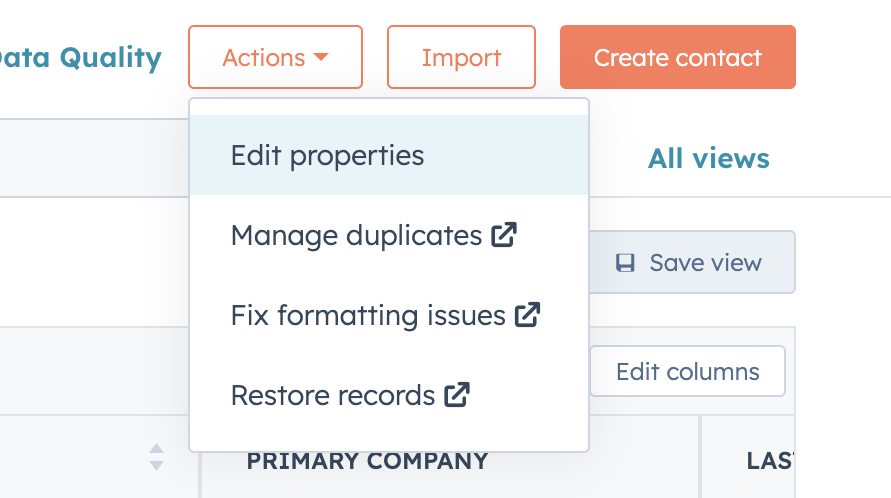
How do I manage duplicate records?
To manage duplicate records, click on "Contacts" in the navigation menu and click "Contacts" again on the drop-down menu. Find the "Actions" button on the top right of the screen and click "Manage Duplicates" on the drop-down menu.
HubSpot will present a list of potential duplicate records based on matching criteria like email address, name, or other specified fields. Review the suggested duplicates to identify true duplicates. HubSpot provides a similarity score to help you assess the level of potential duplication.
Select the checkboxes next to the duplicate records you want to merge or manage. Click on the "Review duplicates" button at the top of the page to proceed. HubSpot will display a side-by-side comparison of the selected duplicate records. Choose the primary record that will serve as the main record for merging the duplicates.
Customize the merge settings if needed. HubSpot offers options to prioritize specific fields, select which values to retain, or overwrite conflicting data during the merge process. Once you've reviewed and set the merge options, click on the "Merge duplicates" button to initiate the merge process.
After the merge is complete, HubSpot will update the primary record with the merged information and remove the duplicate records from the system.
This blog has provided clear and concise answers to common FAQs about HubSpot. Implementing these solutions will help streamline your marketing efforts and maximize your productivity. Stay ahead of the game by utilizing the power of HubSpot based on the insights gained from this blog!